

In this article I change the (in)famous 3 faulty Toko filters with Murata equivalent, due to the well known desensitization problem present in rigs such as Yaesu 857,897, kenwood ts2000, etc…
Regarding this 857d I fixed for a friend, it seems the problem is related to units produced some years ago, but not the newest hardware releases.
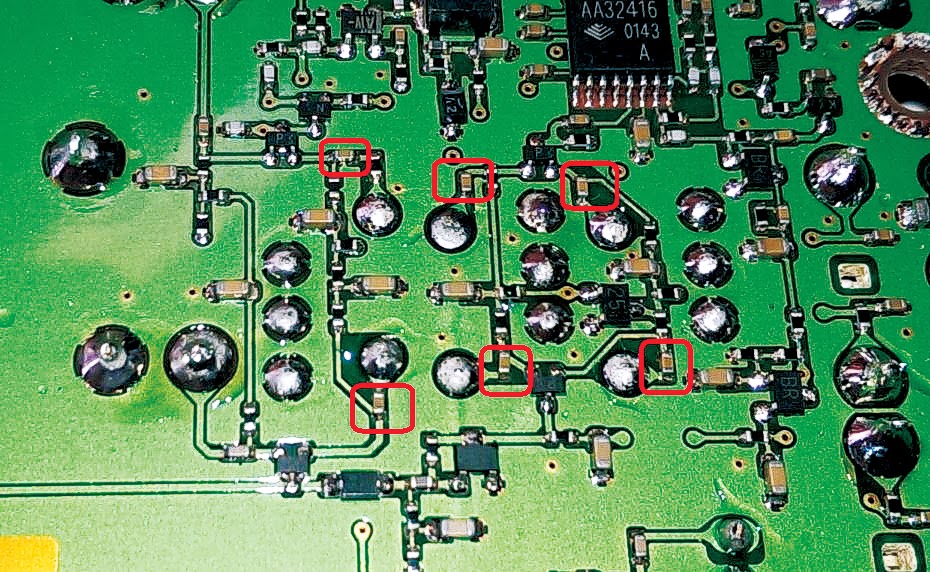
I found a picture of a recent model that shows circuit surrounding the ceramic filters. It is clear that a layout review has been performed (by mama Yaesu) in order to add DC blocking capacitors (to avoid electron migration that seems to be the root cause of filters oxidation).
Side Note:
The reason for the oxidation of the filters is still debated; obviously, there is no official position from Yaesu.
I have read in some internet forums where someone even argue the thesis that “…since Yaesu is Yaesu, it is impossible that they were so careless as to forget to install the DC blocking capacitors, so we can exclude that as the root cause….”
Honestly, we constantly see all sorts of things, especially from manufacturers (not just radio manufacturers, but all electronics…), and it seems very naive to exclude the possibility that a company can make mistakes (to use a modern term: “… defend this like a fanboy…”).
I also want to make it clear that I am a supporter of Yaesu, and my radios are of this brand.
Having said that, I only mention this in support of the initial ipothesis: why did Yaesu add the DC blocking capacitors in the latest revision of the mainboard (see photo below) if they serve no purpose, as some claim?
To the reader, the freedom to form a personal opinion…
Let’s continue…
Synthoms are the usual ones: static discharge noise, desensitization.
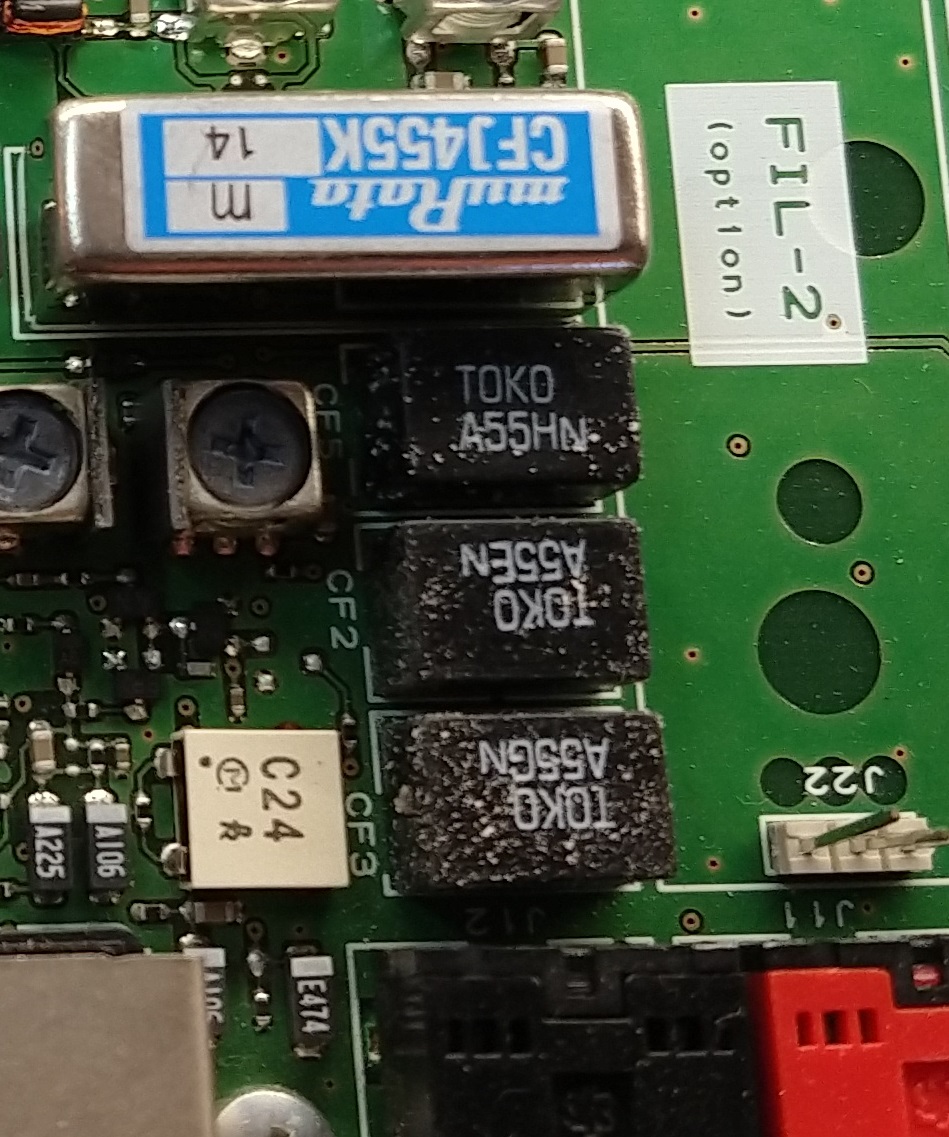
Here you can see the typical filters oxidation (white spots on top of the plastic filter cases):
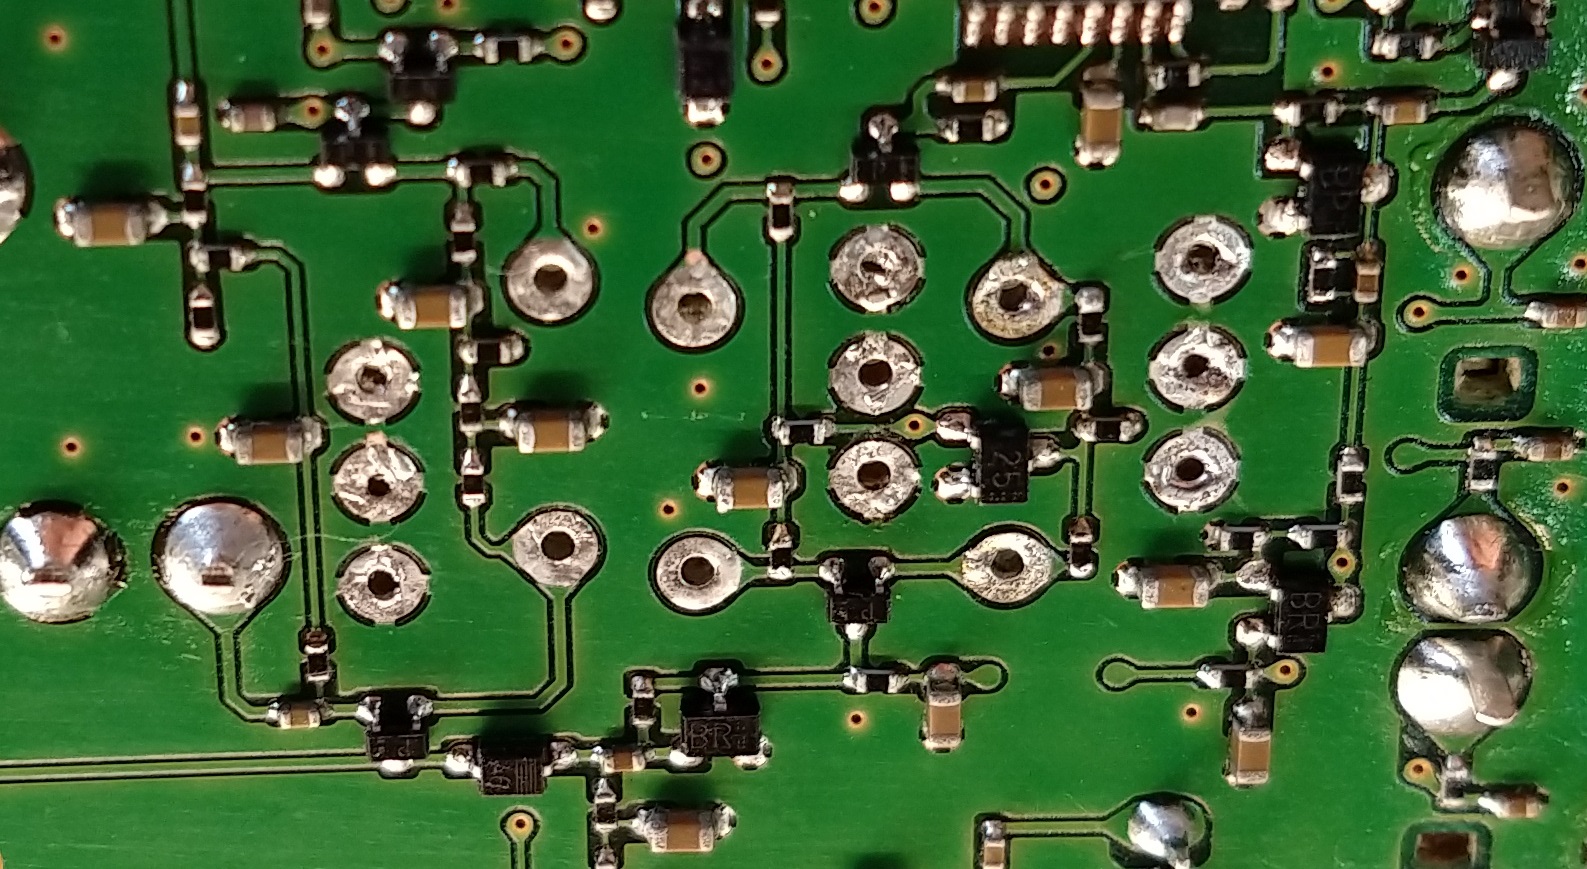
Below the pictures of old and new hardware circuits revised by Yaesu.
In the next picture I replaced 3 filters and cleaned with isopropilyc alchool
Important advice:
in order to properly remove filters, I used for ground copper pads, an “heavy duty” soldering iron, the one probably used by plumbers 🙂 due to the huge thermal dissipation. In this way everything was flawless….
This is the most touchy part…
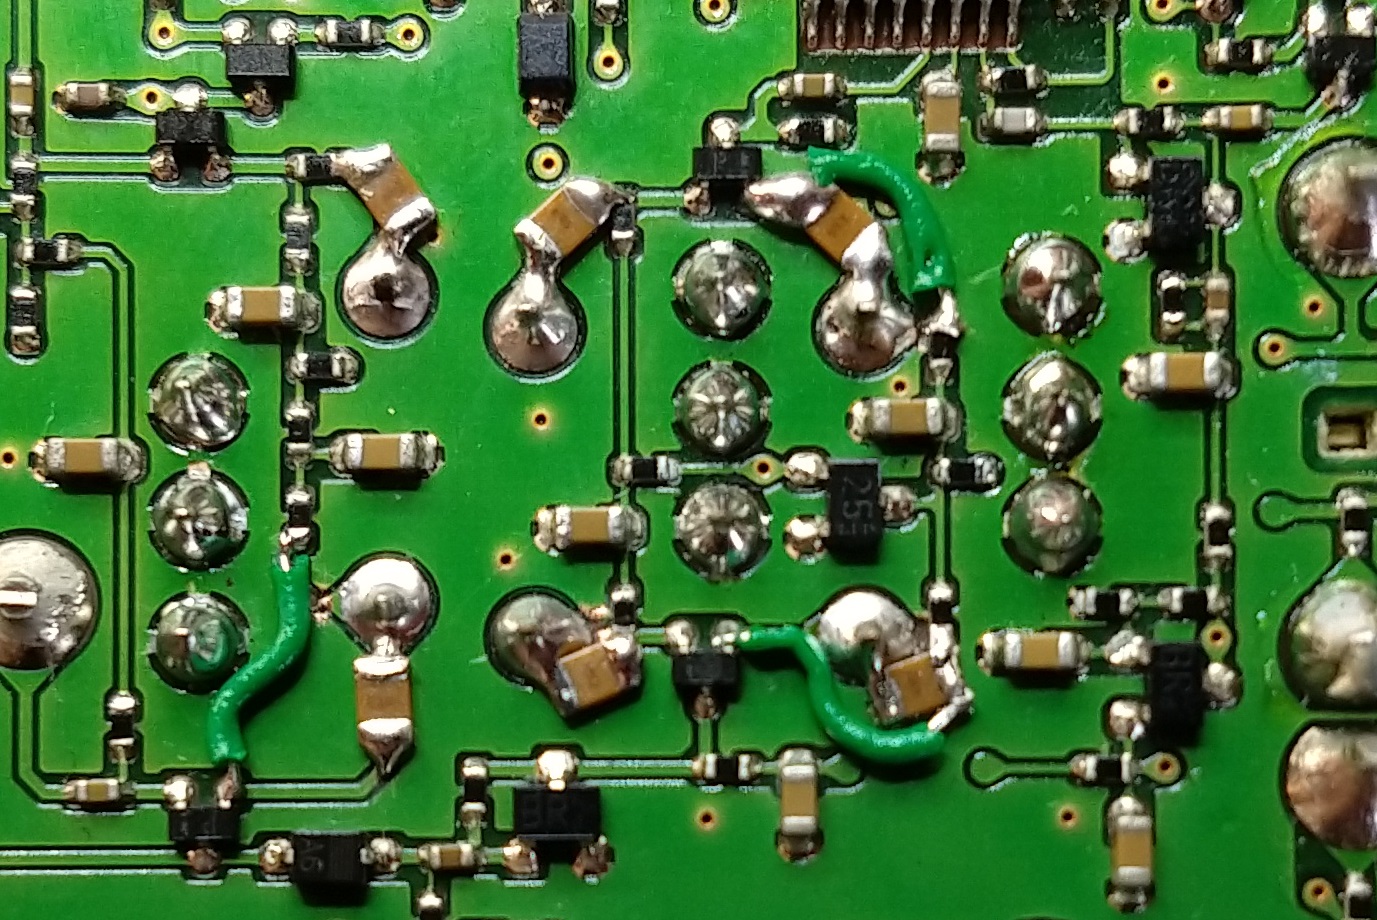
And the following is the concluded repair with DC blocking caps (0.1 μF, 50V) added in series to non-ground pins of each filter (mimic the revised hw version):
here the new Murata filters installed

A final note for whomever will do this repair is to do it only knowing and understanding what you are doing and only with the proper tools (for example I used a stereo microscope to solder, otherwise it would have been a mess…)
Pleas do not improvise or you will damage the radio and I will take no responsability for this (that for me is an hobby); so you will do it at your own risk!
Great article- thanks.
What year was the ” review operation made (by mama Yaesu) in order to add DC blocking capacitors “
Hi Chris,
I have probably an answer for you now! (I just came across a new releas of tech supplement of 2018)
It seems, looking to the schematics that the DC blocking capacitors were added starting from Lot #149 on…
If you search in google “yaesu 857 technical supplement” you will find the 2018 one and from there go to Main unit parts layout, side B and you will see it (compare it with the same for lot 40 to 148 and they are not there….)
If I remember correctly, position 3 and 4 of the rig’s serial number represents the lot numbers
Cheers
Hi, I suppose something near 2013… but take my statement with precaution 🙂
I really don’t know, I am just deducting it from sv8am link posted in the article..
uhf listening decreased on my 857d. I changed all 3 filters as you said. but it didn’t help. still uhf listening low. Do you have any idea about the solution?
There is no magic way to troubleshoot electronics. You have to follow the signal path coming from antenna connector and probe it through all the component using schematics and lab equipment.
Probably you should bring it to a repair shop…
Hi there, thanks for the post!
As I was doing the replacement, reading your instructions and watching this video: https://www.youtube.com/watch?v=fnNK-VFzzaQ I noticed both you and the guy in the video install the replacements into different places than the originals. The PCB is marked with the letters H E G (under the parts). The three filters differ in their bandwidth and impedance (took a minute to find the datasheets.) At least between the Tokos and the LTMs I got, the naming conventions line up (the a55e matches the 455e, the A55G matches the 455G, etc.)
I wondered if you did this intentionally, but after looking at the datasheets, I’m thinking it was just an oversight?
Hi, thanks for this comment. You are right! The picture is showing the swapped filters (I remember I took the picture just after positioning the filters without having them soldered yet…), but I installed them correctly following what was silked onto PCB.
Anyway I changed with correct picture.
Very much appriciated!
No problem, at first I was worried that you knew something I didn’t, and I didn’t want to do it wrong.
Anyway, I finally got around to finishing the repair just now and it’s working perfectly. Maybe better than when I bought it, odds are this issue was already developing when I picked it up used. Thank you so much for making this information available. My main rig is back in action!!
Hi Andrea,
Thank you for a very interesting article, I have changed the items on
two rigs to date. both with great success, but using Toko.
have been tasked with refurbing several rigs from a silent key for the family and my test set tells me at lest three 817,857 and 987
are all at least 10db down on receive all else good.
I shall now change to Murata and inspect the blocking cap situation.. G6VZZ
No problem man!
BTW I doubt that the brand of your newly installed filters is responsible of 10db lost… neither related to the missing dc blocking caps. If I correctly understood what you have done…
After sitting unused for the last year, I went to use my FT-857d this past weekend to use for liason during the 10 GHz & Up contest and noticed static crashes even with the antenna removed. My research brought me here. Thanks for the photos.. “A picture is worth 1000 words” !
I’m curious to know what the function of R151 is on the output side of CF1005. The resistor configuration on this filter is different than the other filters. It doesn’t appear to be part of the PIN diode biasing. Are they using this to reduce the signal level ? It’s been there even before Yaesu added the blocking capacitors.
Regards, Hugh VA3TO
Hi Hugh, I have no idea over your ask. Sorry.